A quick update for you...
I'm going to be posting every single weekday unless something in my personal life comes up. I thought I'd just let you guys know when to expect me. Anyway, we're going to kick off the week with a DIY! Enjoy!
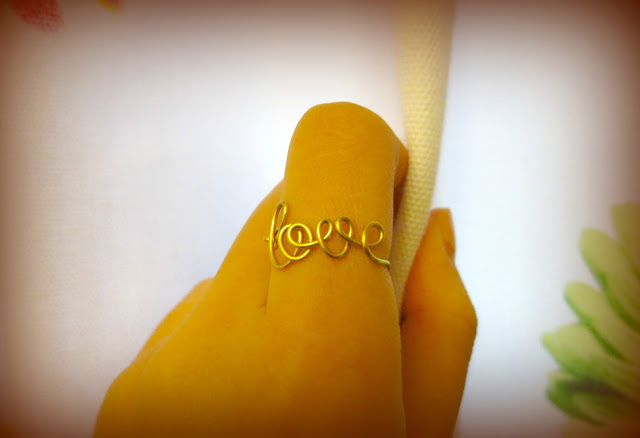
I think that we've all seen the dainty rings at some point in time and I'm completely obsessed with them. There really weren't any that I could find at the big stores like Forever 21 and I was kind of lazy to go on a hunt to find them, so I started to look up some DIY's for these wire rings. I found a bunch of them and with a few modifications, I came up with this! I haven't seen many, or any at all actually, with the word "love," so that's why I decided to post this one today. I'll also be doing one for infinity rings, those rings that aren't like a full band (check out the link), skull rings, and maybe even a tragus cuff and an ear cuff, so keep an eye out for that if it's something you want to learn how to make.
WHAT YOU'LL NEED
- wire cutters (if you don't have any, nail clippers work as well, just not as well)
- 20 gauge wire in gold or silver (I used Bead Landing wire from Michael's, it's just $4.99 - you can also get a 40% off coupon on their website, it's weekly)
- a thick marker of some sort
- pliers (it would be best with round nose pliers, but if you don't have any, like me, I'll show you down below)
- paper towel
- tape
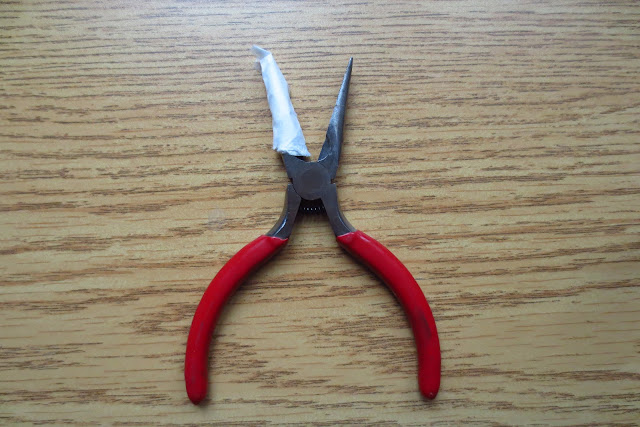
Wrap the paper towel strips around each side of the pliers (like the photo below) and tape it together. Later on, if you need a pointier tip, you can always slide the paper towel on and if as you need to. If you do have round nose pliers, you should use that for making the loops, but it would be a good idea to do these steps as well because you might need padded pliers later on.
The very first thing you need to do is cut your wire (which I forgot to take a picture of, but it's pretty self-explanatory). Cut about 7 inches/18 cm of wire. It might sound like a lot, but if you make any mistakes, you can just cut it off. My ring size is about 6.5, so if yours is bigger, you should cut off some more wire just to be safe.
Then, make a loop for the "l." There are many different ways to make these loops, like with your pliers. I personally prefer to just use my fingers. Don't be discouraged if it doesn't work out the first time. It takes lots of practise to make your "l" look, well, like an "l."
Afterwards, make a smaller loop about half the size as a part of your "o." Then, make another loop about the same size or a bit bigger and twist it around to the top so it looks like the letter "o." Your wire might be popping up in random places, so use your padded pliers and "clamp" it down on the letters that seem to be popping up. It really helps to flatten the letters a bit. You might need to repeat this throughout the whole process of making this wire ring.
Then, make a tiny, tiny loop for your "v." Twist the wire in a lopsided kind of semi-circle shape and make another loop to complete your "v."
Make another loop, about the same size as the "o" loops for your "e."
Now, make a tiny loop with the remainder of the wire of the "l." Curve it into the "l" and using your wire cutters, cut off the excess.
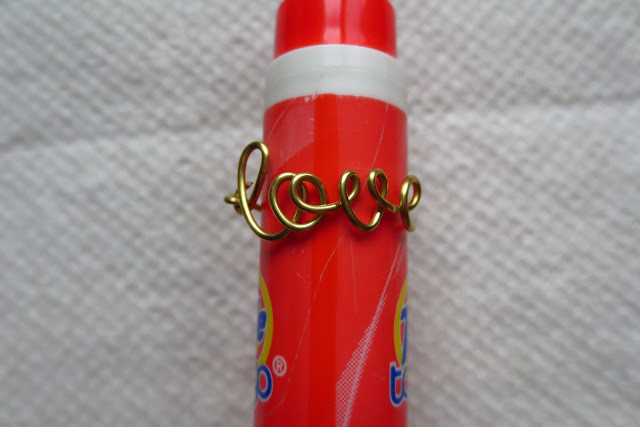
Then, take the wire left after you finished all four letters and start wrapping it around your marker. It might be very stubborn at the beginning, but using the "clamping" method, you should be able to start to get the hang of it.
After that, push the end of the wire through the loop you made beside the "l."
Test it out on your finger to get an idea of how much you have to cut off, or if it's too small, you might have to restart. :(
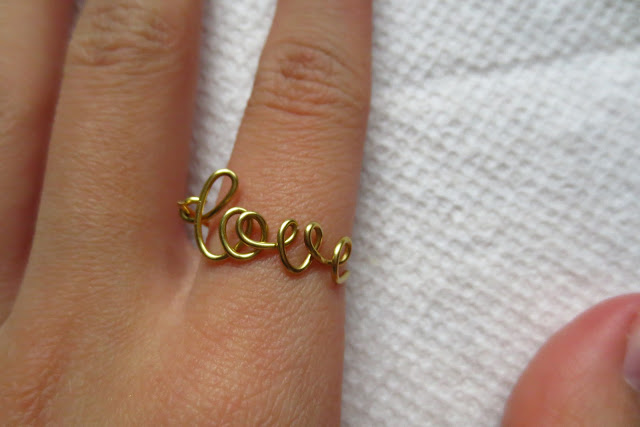
Once you get an idea of the sizing, take that excess wire and wrap it around the loop you made so they interlock. It should look something like this...
As you probably tell, the word is pretty flat, so slide your ring back on the marker to smooth things out a bit so that it wraps nicely around your finger. Take the ring off and the letters down a bit to just make everything look really neat and just... better. You might have to repeat these two steps multiple times to get it perfect. Don't forget to try it on in between to see how it looks and fits!
So there you have it! I hope your rings turned out alright, and if they didn't or you had some problems, let me know in the comments and maybe I could help you out. If your ring is a bit too big or small, just smush or tug on the letters to resize it a bit. I tried this on some different words (like hope - it turned out super well) and on some silver wire and it looks great! I find that a lot of two to four letter words work really well for these rings. It just takes a bit of practise to work well with the wire.


I hope you guys enjoyed this and thanks for reading! Let me know if you tried this out yourself.
- J


This is seriously so cute :) You make it look so easy!!
ReplyDeletexo
Erica of
sweet-endeavors.blogspot.com
Aww... thanks Erica! I hope you'll try it out!
Delete- Juliana